Wednesday, July 30, 2008

The Inada RoboChair Massage Chair - Be Afraid, Very Afraid


by Robin OBrien

Robotic massage chairs seem to entering the realms of science-fiction; they look like they belong on the bridge of the starship Enterprise, come with technical gadgets you need a PhD to even begin to use and just look darn scary to me. The Inada RoboChair massage recliner is probably the meanest, scariest mother of them all - a machine that is only for the bravest or foolhardy of souls.

But in all seriousness, the Inada RoboChair is one serious chair and is perhaps the most technically advanced on the market place. This isn't surprising as Inada are the accepted leaders and just about every new advance in this industry came from its laboratory is Osaka, Japan. The history of the robotic massage chair is the history of Inada - or should that be the other way round?

I wasn't kidding when I said the chair scared me. The footrests, arm cuffs and control panel make the chair look as though it was solely constructed as a torture device, but maybe that's what massage is anyway?

When you first sit in the chair you start to feel powerless as your legs and arms are locked down. A feeling of panic sets in as the chair stirs to life, scanning your body with optical sensors. It really does this before each massage; the infrared sensors determine your acupressure points along the length of your back and then compare your profile to 100 stored profiles. The chair matches your profile to the 'best-fit' stored profile to provide you with a totally customized massage. Apparently in order for any chair to be a true shiatsu massage chair it should be able to detect body shape and find your acupressure points and automatically adjust the rollers.

The chair then goes into one of its many routines that are preset or manual - I don't remember which one as I was to busy trying to stay composed in the vice like grip of the chair, a composure that was sorely tested as the chair began to recline.

The massage I received was very robust; not an inch of the length of my body was spared. I was told this was thanks to the Full Contact armrest, Full Contact footrest and Full Contact back.

Anyhow, just after promising myself that I would never, ever sit in a robotic massage chair again, I was told about its voice activated control system. It's what? I said. I was then shown the microphone that is positioned to one side of the headrest; I'd seen the device earlier but I was too afraid to ask what it was. The person demonstrating the chair positioned the microphone in place - my arms were still locked down - and began to explain to me how it worked.

The voice activation system allows you to change various things like the recline angle and roller programs, and activation of the kneading and tapping programs by simple word commands. Incredible! Suddenly, I was the one in charge. The RoboChair wasn't a menacing Rottweiler after all, but a little, fawning lapdog, who obediently obeyed my every command.

I thoroughly enjoyed playing about with the voice control and forgot all about my earlier trepidations, so much so that I thought I would like to buy the Inada massage chair. I was then told its price tag of $7,500. Gosh. Its price was the scariest thing about the RoboChair. I made good my escape.

About the Author

Follow the links for the Inada massage chair or another robotic massage chair like the OSIM shiatsu massage chair.

Save gas! Turn your car into a water hybrid.

How to Increase Your IQ Easily

Saturday, July 19, 2008

Indoor Plants Love LED Grow Lights

by Imran Ali

LED grow lights are a must for any avid indoor plant grower. Indoor plants are usually very sensitive and require careful and controlled indoor lighting. In the world of indoor plant growing, it has long been a standard to light plants with conventional bulbs in well air-conditioned or ventilated rooms. However, with the spread of LED light bulbs into the lighting industry there are now better ways to energize your plants. But what exactly are the advantages of LED grow lights over regular incandescent light bulbs?

Targeted light frequencies

Light is made up of different frequencies, which each produce a certain color depending on the frequency. When you see a rainbow in the sky, it is "white" light being separated into its different frequencies by droplets of moisture in the sky.

Plants absorb only certain frequencies of light, and what it does not need is reflected away. For example, the molecules in leaves does not absorb green light, and so the green light is reflected away which is why we perceive leaves to be green.

LED grow lights are able to emit light that contains only the range of frequencies that plants can absorb. This allows you to use you electricity more efficiently to produce only what you need.

Low heat

Typical plant lights are usually hot. Just like any other incandescent bulb, heat builds up after a while and can be felt even at a distance. This heat is harmful to plants, and can stunt their growth or even kill them if it's too hot. One solution to this is to air-condition the room or add vents to reduce the heat. However, both these methods can be expensive.

With LED grow lights the bulbs will not get hot. At the most, bulbs will become slightly warm to the touch, even after being on for several hours. This is a significant advantage over incandescent bulbs because it allows you to protect your plants from heat and at the same time help you save on electricity.

Low voltage

LED's are low voltage and require less than 20 volts of electricity, which much less than incandescent bulbs. This is another aspect of LED's that can help reduce your electricity costs.

No ballast required

Mounting systems for LED grow lights are usually much lighter than conventional systems. This is because a ballast is usually required for incandescent systems, which is extremely heavy. Furthermore, ballast need to be replaced after some time, which will add to your expenses. With LED grow lights, not requiring a ballast will provide you with a more functional and lighter system, and will save you some extra cash.

Longer life

LED bulbs last considerably longer than regular bulbs. LED bulbs have a life of approximately 100,000 hours. This is almost 50 times longer than conventional light bulbs. Not only that, but regular light bulbs need to be changed even before they die because as the bulb ages the light spectrum changes. With LED bulbs, the light spectrum remains constant throughout their lifetime.

No reflector necessary

For traditional bulbs, light is emitted in all directions. In order to focus the light, a reflector is needed. Reflectors are often bulky and heavy, and will also add on to your expenses. With LED bulbs, the light is already focused in the proper direction, because reflectors are already built into the bulbs themselves.

Knowing these main advantages, it is easy to see why LED grow lights are superior to conventional bulbs. They provide better light, use less electricity, and require less equipment to run. If you are interested in learning more about LED lights, there are many great websites out there that can provide you with all technical information you need.

About the Author

My name is Imran. I am an SEO article writer.

Save gas! Turn your car into a water hybrid.

How to Increase Your IQ Easily

Can You Watch TV On Computer?: Knowing the Requirements

by Rashel Dan

You may have been faced with the question, "Can You Watch TV On Computer?" It used to be that this was an impossible question to answer. After all, a computer is capable of so many things so why can't it also be used to watch television shows? Sure, one can download movies or TV shows and clips to view later. But what about actual streaming television programming; can it be done? Now you can answer your friends with confidence that it's possible if they have the right tools.

Essentials

Computer Unit - The first advice that you can give a friend who is wondering about satellite television on PC technology is this: you need to get a computer. This is the most essential piece when it comes to this technology. The next very important requirement is to have an Internet connection.

An Internet Connection - Now, it's not enough to just have any kind of Internet connection. Simply put, an Internet connection in this context means that one needs to have more than dial-up speed for satellite TV on PC to be successful. A comfortable speed would be about 1MBPS of Internet speed, or broadband. This is because all the content that will be sent to a computer is streamed and streaming needs a whole lot of bandwidth to be done successfully.

Additional Hardware

Just Softwares - When it comes to satellite television being streamed into your computer, you no longer need any new peripherals or special devices to hook up to your computer. That's a thing of the past. Satellite television on the computer only needs a software component for it to work. However, there are enhancements to make the experience more pleasant for the viewer.

For example, if one wants loud and blaring sounds while watching programs on the computer, then one can install good speakers. Also, another option is to hook up the computer to a projector. This is actually a really good idea because then you can project the satellite television channels onto a large wall so that everybody can watch what you are watching.

3000 Channels - This is great for a family setting where you can all sit down and watch 3000 channels together. Yes, there are that many channels through the satellite TV for PC application. Can you watch on computer? Yes, with this set up, you all can.

It's An Application?

Again, all you need for this to work is software. The application itself can be bought from many different providers of this satellite TV service. Many of these services can be found on the Internet. The software itself is not that expensive and it is really easy to install. In fact, once you install it, you can use it right away. This is the most essential requirement because without the application your laptop or computer is just that: a computing device. Check out some of the best deals on the Internet for the application that you want to install.

Cheap Cost - Satellite TV on the computer is becoming very popular because of one thing: it's cheap. For a one-time installation, you can enjoy all the programs in the world without having to pay a monthly fee. This is one great reason to stop subscribing to cable and to start using a newer and more viable solution. Can you watch TV on Computer? If you want to enjoy and save money, you will.

About the Author

Can you watch tv on computer? Read more regarding watching digital tv on your pc now.

Save gas! Turn your car into a water hybrid.

How to Increase Your IQ Easily

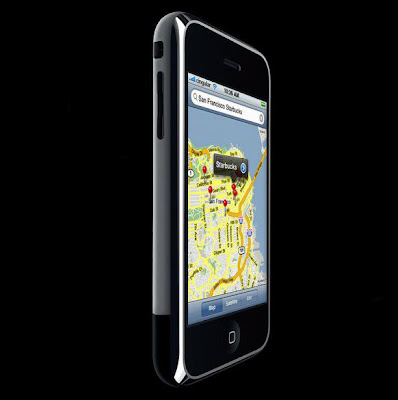
Convert DVD and HD video to iPhone 3G (Mac & PC)

by HansOm

One of the best features of iPhone is that it is the best iPod Apple ever created. The recently released iPhone 3G has surpassed iPod touch and the old iPhone in regard of entertaining functions, and it even supports MOV movies and has a memeory up to 16G, which is more than enough to store multiple movies. With the larger memory of Phone 3G, we are now enabled to put a lot more movies on iPhone.

I am using a Mac machine and I would like to share a guide for Mac users about how to convert DVD and video onto iPhone 3G with two apps I use: DVD to iPhone 3G app and a video to iPhone 3G app:

1. Rip DVD to iPhone 3G

2. Convert video to iPhone 3G

Part 1. Rip DVD to iPhone 3G[

Install Wondershare DVD to iPhone 3G for Mac, and follow the three steps below to convert DVD to iPhone 3G:

Step 1: Import DVD Movie

Click the Load DVD button, select the folder of your DVD movie, and click OK. If the movie is on your disc drive, you can just select the drive and click OK. Or click the Load IFO button, open the folder of your DVD movie, and you will find two folders in it: AUDIO_TS and VIDEO_TS. Open the VIDEO_TS folder, select all the IFO files, and then click OK.

After the movie is imported, you can see all the chapters and titles in it, and then you can check the ones you want to convert. If you want to convert the whole movie, you can just keep all the titles or chapters checked.

Step 2: Output Settings

Before the conversion, there are a few settings you could make: 1. Select the iPhone 3G Video format from the Format drop-down list (Besides iPhone video and iPhone audio, this software also supports outputting video and audios for iPod and Apple TV). 2. Click the Settings button to set encoding settings including video resolution, frame rate, bit rate and video encoder, audio encoding settings including sample rate, channel, bit rate and audio encoder. 3. Name each title/chapter in the Output Filename field, and select the subtitle and audio track for the titles/chapters.

Note: You can check the "Merge into one file" option to join all the selected DVD titles/chapters into one file instead of creating a separated file for each title/chapter.

Step 3: Convert DVD

Click the Start button to start the conversion. And now you can just go for a walk and wait till the conversion is completed. After that, you can just transfer the created files to your iPhone 3G with iTunes.

Tip 1: Trim Movie If you just want to convert a clip from your DVD movie, you can click the Trim icon to capture a clip. In the Trim window, you can trim the length of the current title/chapter by either dragging the Start Time and End Time sliders or setting the time parameters in each corresponding field.

Tip 2: Crop Video If your DVD video has black sides, you can use this Crop function to remove them. Click the Crop icon to open the Crop window, and set the crop area by dragging the crop frame or setting the four crop parameters (Top, Bottom, Left and Right).

Tip 3: Movie Effect If you are not content with the original effect, you can click the Effect icon to set the video brightness, contrast, saturation, and audio volume. You can also choose to apply a special effect to your movie video from effects including Gray, Emboss and Negative.

Part 2. Convert video to iPhone 3G

Install Wondershare Video to iPhone 3G converter for Mac and follow the below steps to put video on iPhone 3G. (Tip: This iPhone converter for Mac can also convert video to iPod and Apple TV)

Step 1: Add Video files

Click the Add button, and the program will let you browse your computer hard drive. Select the video files you want to convert and click OK.

Step 2: Output Settings[

After adding video files, you can start to set output settings for each file: 1. Select an output format from the Format drop-down list. Just select an format according to the player which you want to put your video on. 2. Click the Settings button to set encoding settings including video resolution, frame rate, bit rate and video encoder, audio encoding settings including sample rate, channel, bit rate and audio encoder. 3. Click the Browse button to specify an output folder to save the converted files.

Note 1: If you want to convert all the added files into one format with the same encoding parameters, you can just click the "Apply to All" button. Note 2: You can check the "Merge into one file" option to convert all the added video files into a single file.

Step 3: Convert Video

Click the Start button to start the conversion. And all you need to do now is to wait for the conversion to be finished. The remaining time will be shown on conversion window for your reference.

And you can also edit your video with trimming, cropping and setting effect, which are similar with you do in ripping DVD to iPhone 3G. Note: If a converted video has stripe, you can select a Deinterlace mode in Effect Settings and convert the original file again to remove the stripes.

Hope the above info will help you put your movies on your iPhone 3G.

Related Articles: 1. Convert DVD to iPhone 3G on PC 2. Convert Video to iPhone 3G on PC

Source from: http://www.dvd-ripper-copy.com/articles/convert-dvd-video-to-iphone-3g.html

About the Author

Working on video converter and DVD ripper software

Save gas! Turn your car into a water hybrid.

How to Increase Your IQ Easily

Nintendo Wii: Gain a High-tech Gaming Experience

by Adam Caitlin

The gaming consoles are considered as the "latest" wonders in the domain of advanced technology. These consoles are very much popular among avid players, teenagers, tech-savvy users and children as well. There are many gaming consoles in the market. The Nintendo Wii for instance, since its launch in 2006, has given a tough competition to other existing gaming consoles from various top brands. Some other well known gaming consoles are Sony Playstation 3 from the Sony entertainment and Xbox360 from the lineage of Microsoft. The latest Nintendo Wii is advanced version of Nintendo Game Cube. This advanced version offers some highly capable features such as intuitive control and impressive graphical capabilities. This device looks resembles more like a TV remote than a game pad to control the gaming functions.

This home video game console belongs to the fifth generation of Nintendo. With some of the advanced features, the Wii targets a broader demographic more so when compared to other existing gaming console. The main and attractive features that make it stand out in the crowd includes a wireless controller, a remote and a WiiConnect24.The Nintendo Wii is the smallest gaming console with the dimensions of 44 mm in width, 157 mm in height and 215.4 mm in thickness, when placed in the vertical orientation. It weighs only 1.2 Kg in total, which makes it the lightest console of the three major seventh generation gaming devices. This gaming console can be placed in either mode i.e. horizontal or vertical, according to one's convenience.

The Wii Remote is key controller of this console. This controller is formed with a combination of built-in accelerometer and infra-red detection to sense the position in 3D space. The Nintendo Wii is designed in such a manner that users can easily control the gaming features and functions by using the physical gestures as well as built-in traditional buttons presses. As a matter of fact, this Wii Remote is connected with console with the help of wireless Bluetooth technology. This console can be connected with other compatible devices through a proprietary port, which is placed in base of the controller.In addition, an attachable wrist strap can be used to avoid unintentionally dropping or throwing of the Wii Remote. Therefore, it can be said that it provides stronger replacement for all other straps. The Wii Remote Jacket can be used for extra grip and protection.

The menu-operating interface in the Nintendo Wii is designed keeping the concept of television channels. Different channels are graphically displayed in a grid formation. One can navigate through different channels using the pointer capability of Wii remote. One can change the arrangement of the channels by holding down two button keys of the device. There are six main channels on the console namely- the Disc Channel, Mii Channel, Photo Channel, Wii Shop Channel, Forecast Channel and news Channel.The distinguishing feature Wiiconnect24 can be used to connect with other people on the internet. This gaming console device boasts 802.11b/g Wi-Fi and USB-to-Ethernet adapter, which helps to gain the high-speed while accessing the internet. Therefore, one can easily avail the benefits of Nintendo Wi-Fi connection services.

The users can send and receive the messages as well as get the latest updates over the internet, even in the standby mode. Apart from the high-speed internet connectivity, other features this console includes Virtual Console, WiiConnect24, Internet Channel, Check Mii Out Channel and lots more.Lat but not the least, this system helps to communicate and connect the users with other Wii systems via a self-generated wireless LAN. The Nintendo Wii is enriched with a massive storage capacity of 512 MB. Therefore,without worrying about the space, one can store various games, visuals and other data.

Save gas! Convert your car to burn water

How to Increase Your IQ Easily

Sunday, July 13, 2008

Solar Power Energy

by Editor123

Today, we are polluting our environment by consuming tons of fuel to carry out our day to day tasks. Also, we are leaving behind only a very small amount of fuel reserves for our next generations as these resources are depleting at an alarming rate. Only when we implement new methods that use renewable sources of energy like solar energy, wind energy and tidal energy we can save our mother earth.

Even though, many forms of renewable sources of energy are available everywhere, solar energy comes with added benefits. With the federal tax credits, net metering and state subsidiary programs, using solar panels would really benefit the individual. Solar platforms can be installed with the help of professional solar installers as most electricians lack the knowledge required to install a solar panel system. On the other hand, you can avail the tax rebate and credit programs only when the installation is done by a professional. So, you can rely upon a solar installer to install your solar platform in an economic and practical manner.

To get started, you should calculate the amount of electricity you use in a day or a month. You can find this information from your utility bill and also you can estimate the cost of electricity that your household uses in a year. Also, you can find out the period of high energy use and with these data in hand, you can decide on the nature of solar power panel that you need.

Solar panel systems are expensive and hence you should know each and every detail before purchase and installation. The solar installer that you approach should have a solar contractor license and if you are attaching the solar panel with a grid system, the solar installer should have proficiency on doing such installations.

Finally, while calculating the cost involved in the purchase and installation of the solar panel system, you should consider some factors like the amount of electricity you anticipate to generate and the money that you save from the local rebates and tax credits. Also, some states offer financial incentives to cut down the upfront investment costs involved in the purchase of a solar panel system. So, after analyzing all these details you should approach your solar installer. Even you can take the help of your solar installer to arrive at a decision as they will have the required expertise and knowledge.


About the Author

The article is contributed by a professional content writer, having experiences of working in different industries. For further information on California solar installers and solar installers please visit at http://www.getsolar.com/

Save gas! Turn your car into a water hybrid.

How to Increase Your IQ Easily